Jupyter 配置
安装软件包
shell
# 使用默认源安装
pip install jupyterlab | notebook | voila

# 使用镜像源安装
pip install [name] -i https://pypi.tuna.tsinghua.edu.cn/simple

# 启动 jupyter
jupyter lab | notebook其他环境内核
shell
# 在指定环境中安装
conda install -n [env_name] ipykernel

# 写入内核
python -m ipykernel install --user --name [env_name] --display-name [env_name]

# 查看内核列表
jupyter kernelspec list

# 删除内核
jupyter kernelspec remove [env_name]配置中文界面
安装语言包,然后刷新 Jupyter 网页,在顶部选项卡的 Settings -> Language 处选择语言
shell
pip install jupyterlab-language-pack-zh-CN修改 jupyter 配置文件
shell
# 在 ~/.jupyter/ 目录下生成相应配置文件
jupyter notebook --generate-config

# 生成密码,用来登录 jupyter 在线平台,保存在下图 json 文件中
jupyter notebook password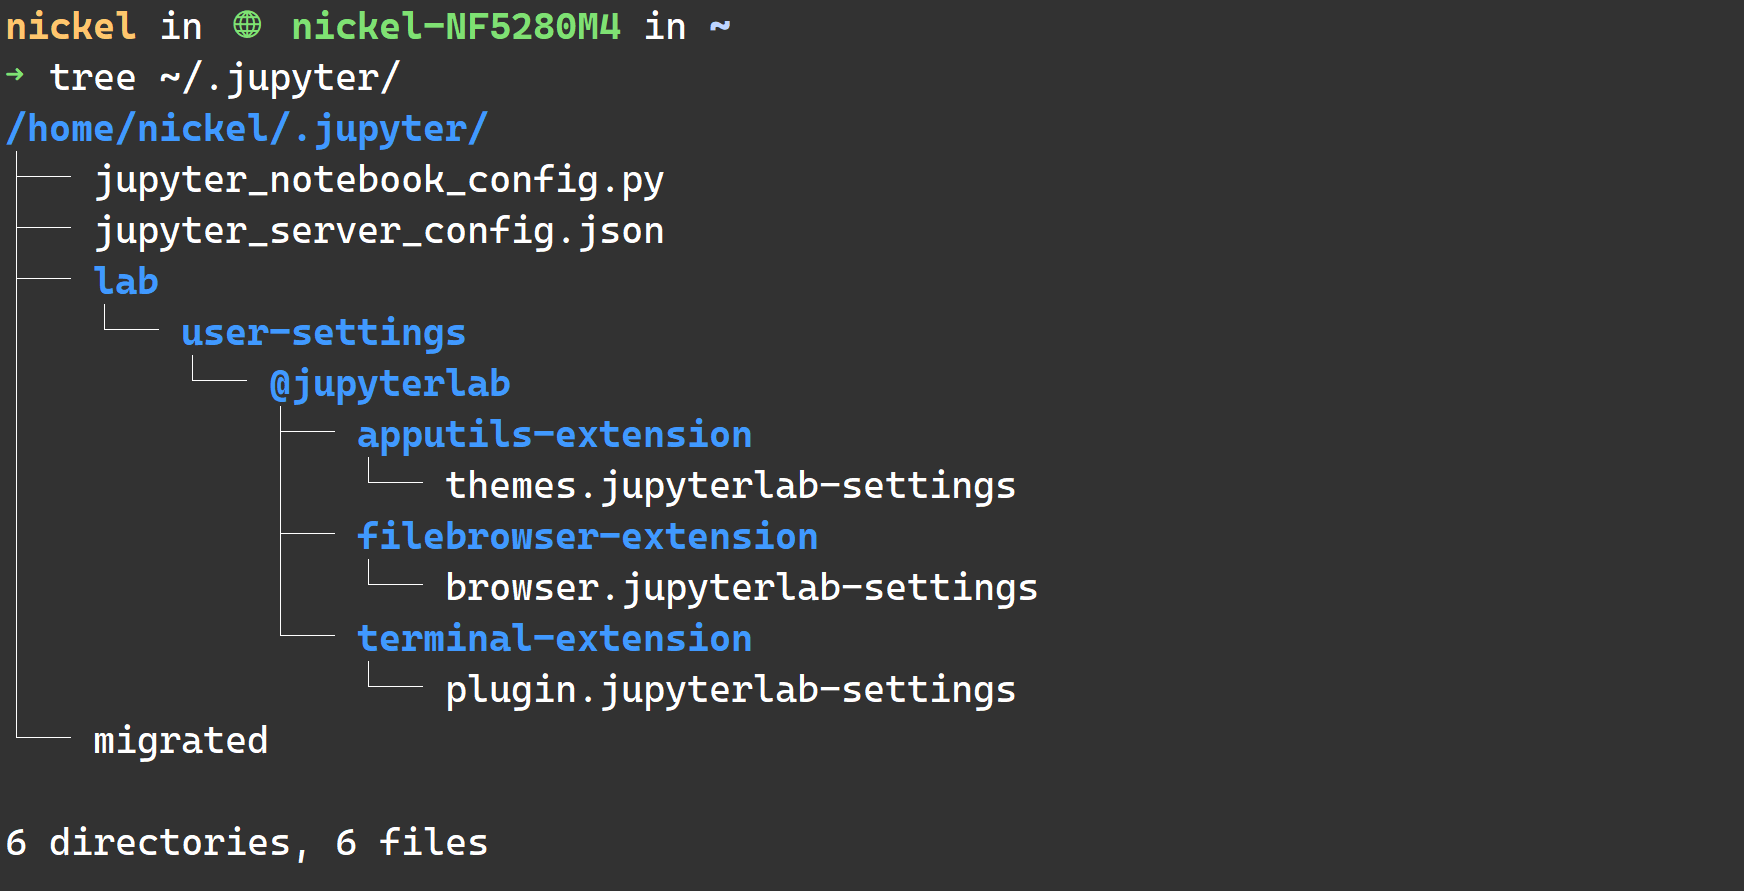
conda 环境配置
以下命令会把 conda 环境安装到用户目录下,路径为 ~/miniconda3
shell
# 安装
mkdir -p ~/miniconda3
wget https://repo.anaconda.com/miniconda/Miniconda3-latest-Linux-x86_64.sh -O ~/miniconda3/miniconda.sh
bash ~/miniconda3/miniconda.sh -b -u -p ~/miniconda3
rm -rf ~/miniconda3/miniconda.sh

# 初始化 shell
~/miniconda3/bin/conda init bash
~/miniconda3/bin/conda init zsh编辑 ~/.condarc,配置清华镜像源:
text
channels:
  - defaults
show_channel_urls: true
default_channels:
  - https://mirrors.tuna.tsinghua.edu.cn/anaconda/pkgs/main
  - https://mirrors.tuna.tsinghua.edu.cn/anaconda/pkgs/r
  - https://mirrors.tuna.tsinghua.edu.cn/anaconda/pkgs/msys2
custom_channels:
  conda-forge: https://mirrors.tuna.tsinghua.edu.cn/anaconda/cloud
  msys2: https://mirrors.tuna.tsinghua.edu.cn/anaconda/cloud
  bioconda: https://mirrors.tuna.tsinghua.edu.cn/anaconda/cloud
  menpo: https://mirrors.tuna.tsinghua.edu.cn/anaconda/cloud
  pytorch: https://mirrors.tuna.tsinghua.edu.cn/anaconda/cloud
  pytorch-lts: https://mirrors.tuna.tsinghua.edu.cn/anaconda/cloud
  simpleitk: https://mirrors.tuna.tsinghua.edu.cn/anaconda/cloud
deepmodeling: https://mirrors.tuna.tsinghua.edu.cn/anaconda/cloud/在 Windows 上的安装比较简单,下载 exe 安装包后根据提示完成安装,需要注意以下几点:
- 若找不到
conda命令,需要把miniconda安装目录下的Scripts文件夹添加到环境变量 - 选择“为我安装”而不是“全局安装”,可能会出现权限问题(使用管理员运行也不行)
- 选择 C 盘以外的其他位置
如果 Windows 的 C 盘空间有限,在上述文件中添加以下配置
text
envs_dirs: [E:\conda_envs\envs]
pkgs_dirs: [E:\conda_envs\pkgs]
因为 conda 是“绿色安装”的方式,所以要手动更新它的版本:
shell
conda update -n base -c defaults conda环境移植
没有名字:https://blog.csdn.net/weixin_39165863/article/details/127527873
官方文档:https://conda.io/projects/conda/en/latest/commands/config.html
pytorch 环境配置
shell
# cuda 11.8
conda install pytorch torchvision torchaudio pytorch-cuda=11.8 -c pytorch -c nvidia

# cuda 12.1
conda install pytorch torchvision torchaudio pytorch-cuda=12.1 -c pytorch -c nvidiacuda 环境配置
如果遇到错误:Library cudart is not initialized,安装 cudatookit 可以解决该问题
shell
# 查看 cuda 版本
conda list | grep cuda

# 安装 cuda toolkit,版本要和实际环境一致,如下图所示
conda install cudatoolkit=11.8 -c nvidia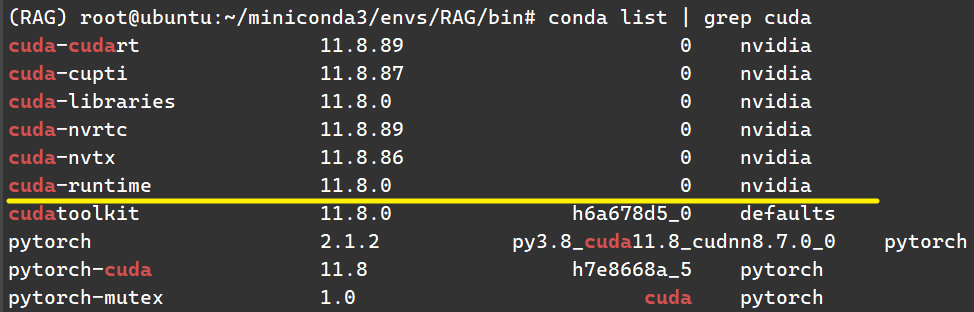
如果上述方法行不通,可以参考通过下载离线包 手动安装 这种方式
或者按照官网教程来,里面包含了卸载的方法